Writing a UserDefaults editor with SwiftUI and property wrappers
May 4, 2020
I've been talking a lot online about how useful SwiftUI has been in building debug components for Fluency:
Debug menus are one of the places where you can start using SwiftUI today, and I've found that since writing little UIs is easier with SwiftUI, I've been able to create a lot more developer tools for myself, during the actual development of the app.
I thought I'd highlight in this post one of the debug tools I developed for editing the app's known UserDefaults on the fly, since I found it to be especially nice and elegant when combined with modern Swift components like property wrappers, keypaths, and bindings.
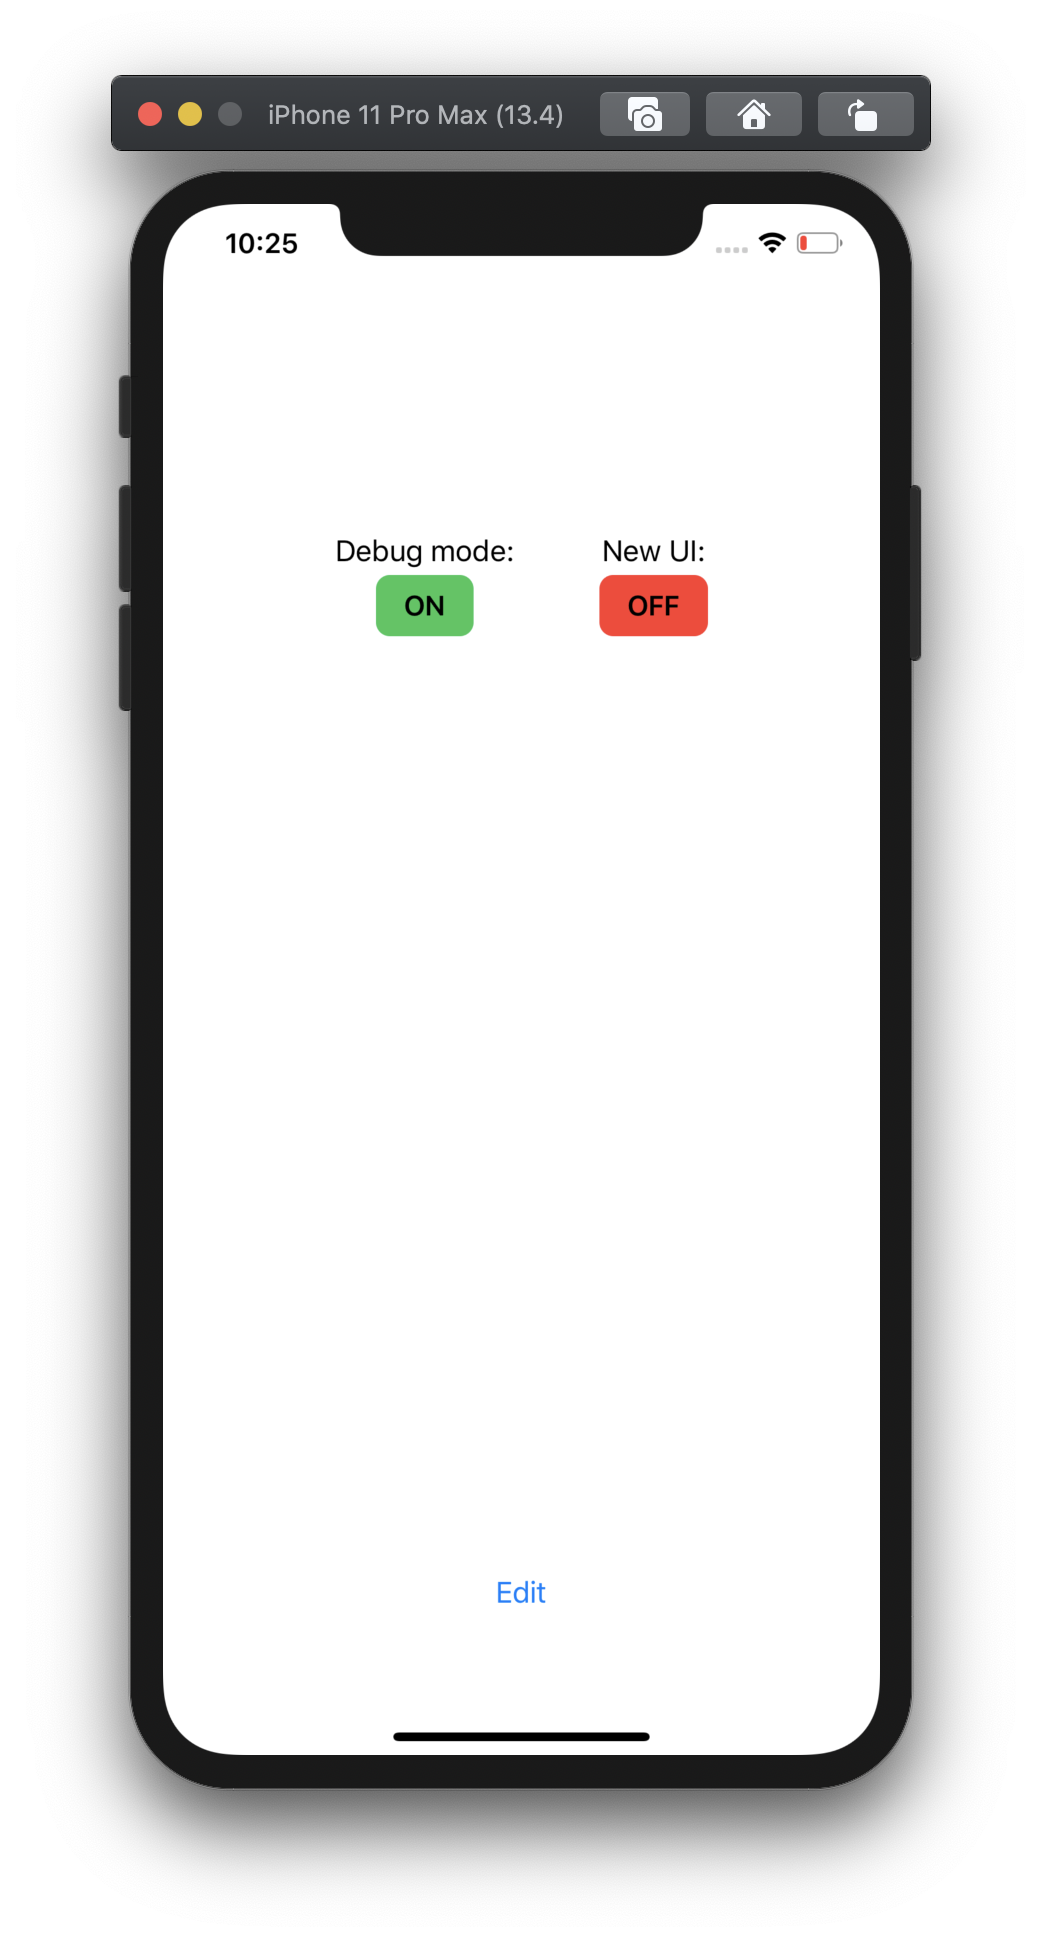
The UI we're building is doesn't have a lot of components: each boolean user default gets a toggle, and when you tap the toggle, the user default gets persisted:
The full code in a sample app is available at NGSwiftUIUserDefaultsEditorExample. The example is an iOS app, but almost the exact same code works with macOS as well!
UserDefaults with property wrappers
A lot has been written about writing your app's UserDefaults as a global object with property wrappers - in fact, I think it's one of the few cases I've come across where property wrappers make a lot of sense to use over other methods. The Fluency property wrapper looks like this:
@propertyWrapper
struct SimpleUserDefault<T> {
    let userDefaults: UserDefaults
    let key: String
    let defaultValue: T

    init(
        userDefaults: UserDefaults = UserDefaults.standard,
        key: String,
        defaultValue: T
    ) {
        self.userDefaults = userDefaults
        self.key = key
        self.defaultValue = defaultValue
    }

    var wrappedValue: T {
        get {
            guard let data = userDefaults.object(forKey: key) as? T else { return self.defaultValue }
            return data
        }

        set {
            userDefaults.set(newValue, forKey: key)
        }
    }
}
I've found this implementation works well for native values like bools (if you want more complicated encoding/decoding, your mileage may vary). The next step is to create a global object (I call mine UserDefaultsConfig) which wraps the defaults. For this post we'll assume we have two defaults: one to enable debug mode in our app, and one to hide a new UI we don't want released yet:
class UserDefaultsConfig {
    static let shared = UserDefaultsConfig()

    @SimpleUserDefault(
        key: "com.getfluencyio.is-test-mode-enabled",
        defaultValue: false
    )
    var testModeEnabled: Bool

    @SimpleUserDefault(
        key: "com.getfluencyio.is-new-ui-enabled",
        defaultValue: false
    )
    var newUIEnabled: Bool
}
Wherever we want to check out defaults, we can use
if UserDefaultsConfig.shared.testModeEnabled { /*...*/ }
to determine the default's value. But the really interesting part is building a debug tool for ourselves which lets us edit each of these flags on the fly.
Editing UI
For the editing UI in our debug menu, we'll write a quick SwiftUI view:
struct UserDefaultsView: View {
    var body: some View {
        List {
            UserDefaultsConfigToggleItemView(
                /* reference testModeEnabled here */
            )
            UserDefaultsConfigToggleItemView(
                /* reference newUIEnabled here */
            )
        }.navigationBarTitle("UserDefaults Editor", displayMode: .inline)
    }
}
But the implementation of UserDefaultsConfigToggleItemView isn't super straightforward. In fact, how to make this work in an elegant way has been confusing to more people than just me:
Let's break the problem into a simpler piece: how would we write this UI if UserDefaults wasn't involved? Probably we'd use a few @State properties and a Toggle:
struct UserDefaultsConfigToggleItemView: View {
    @State var isOn: Bool = false
    let name: String

    var body: some View {
        HStack {
            Toggle(isOn: self.$isOn) {
                Text(name)
            }
            Spacer()
        }
    }
}
Since Toggle takes a Binding, we'll have to find a way to access the properties of our UserDefautlsConfig using a Binding. We could go the brute force method: write get and set functions for each property, and update our view to take a binding:
let testModeEnabledBinding = Binding(get: {
    UserDefaultsConfig.shared.testModeEnabled
}, set: {
    UserDefaultsConfig.shared.testModeEnabled = $0
})

struct UserDefaultsConfigToggleItemView: View {
    let binding: Binding<Bool>
    let name: String

    var body: some View {
        HStack {
            Toggle(isOn: self.binding) {
                Text(name)
            }
            Spacer()
        }
    }
}
This will work, but it's a lot of code to type out for every single property you want to edit. 😿
One step further would be to use key paths to create the binding:
extension Binding {
    init<RootType>(
        keyPath: ReferenceWritableKeyPath<RootType, Value>,
        object: RootType
    ) {
        self.init(
            get: { object[keyPath: keyPath] },
            set: { object[keyPath: keyPath] = $0}
        )
    }
}

let testModeEnabledBinding = Binding(
    keyPath: \.testModeEnabled,
    object: UserDefaultsConfig.shared
)

struct UserDefaultsConfigToggleItemView: View {
    let binding: Binding<Bool>
    let name: String

    var body: some View {
        HStack {
            Toggle(isOn: self.binding) {
                Text(name)
            }
            Spacer()
        }
    }
}
We've reduced the boilerplate for each binding, but...we still have to write out a new one for every user default we want to edit.
As I was working with this, I realized a better way would be to make the UserDefaultsConfig object observerable itself! If we conform our config to ObservableObject, then we can have every toggle item observe one of its keypaths, which ends up looking quite nice:
class UserDefaultsConfig: ObservableObject {
    static let shared = UserDefaultsConfig()

    let objectWillChange = PassthroughSubject<Void, Never>()

    @SimpleUserDefault(
        key: "com.getfluencyio.is-test-mode-enabled",
        defaultValue: false
    )
    var testModeEnabled: Bool {
        willSet {
            objectWillChange.send()
        }
    }

    @SimpleUserDefault(
        key: "com.getfluencyio.is-new-ui-enabled",
        defaultValue: false
    )
    var newUIEnabled: Bool {
        willSet {
            objectWillChange.send()
        }
    }
}
Since these properties aren't @Published, we need to inform SwiftUI that the object should change any time one of them is updated, which is why we call objectWillChange.send() on every willSet. However, this makes it really easy to write the editor view, which is the finished product that I used for Fluency:
struct UserDefaultsConfigToggleItemView: View {
    @ObservedObject var defaultsConfig = UserDefaultsConfig.shared
    let path: ReferenceWritableKeyPath<UserDefaultsConfig, Bool>
    let name: String

    var body: some View {
        HStack {
            Toggle(isOn: Binding(
                keyPath: self.path,
                object: self.defaultsConfig
            )) {
                Text(name)
            }
            Spacer()
        }
    }
}

struct UserDefaultsView: View {
    var body: some View {
        List {
            UserDefaultsConfigToggleItemView(
                path: \.testModeEnabled,
                name: "Test Mode"
            )
            UserDefaultsConfigToggleItemView(
                path: \.newUIEnabled,
                name: "Hide Test Mode UI"
            )
        }.navigationBarTitle("UserDefaults Editor", displayMode: .inline)
    }
}
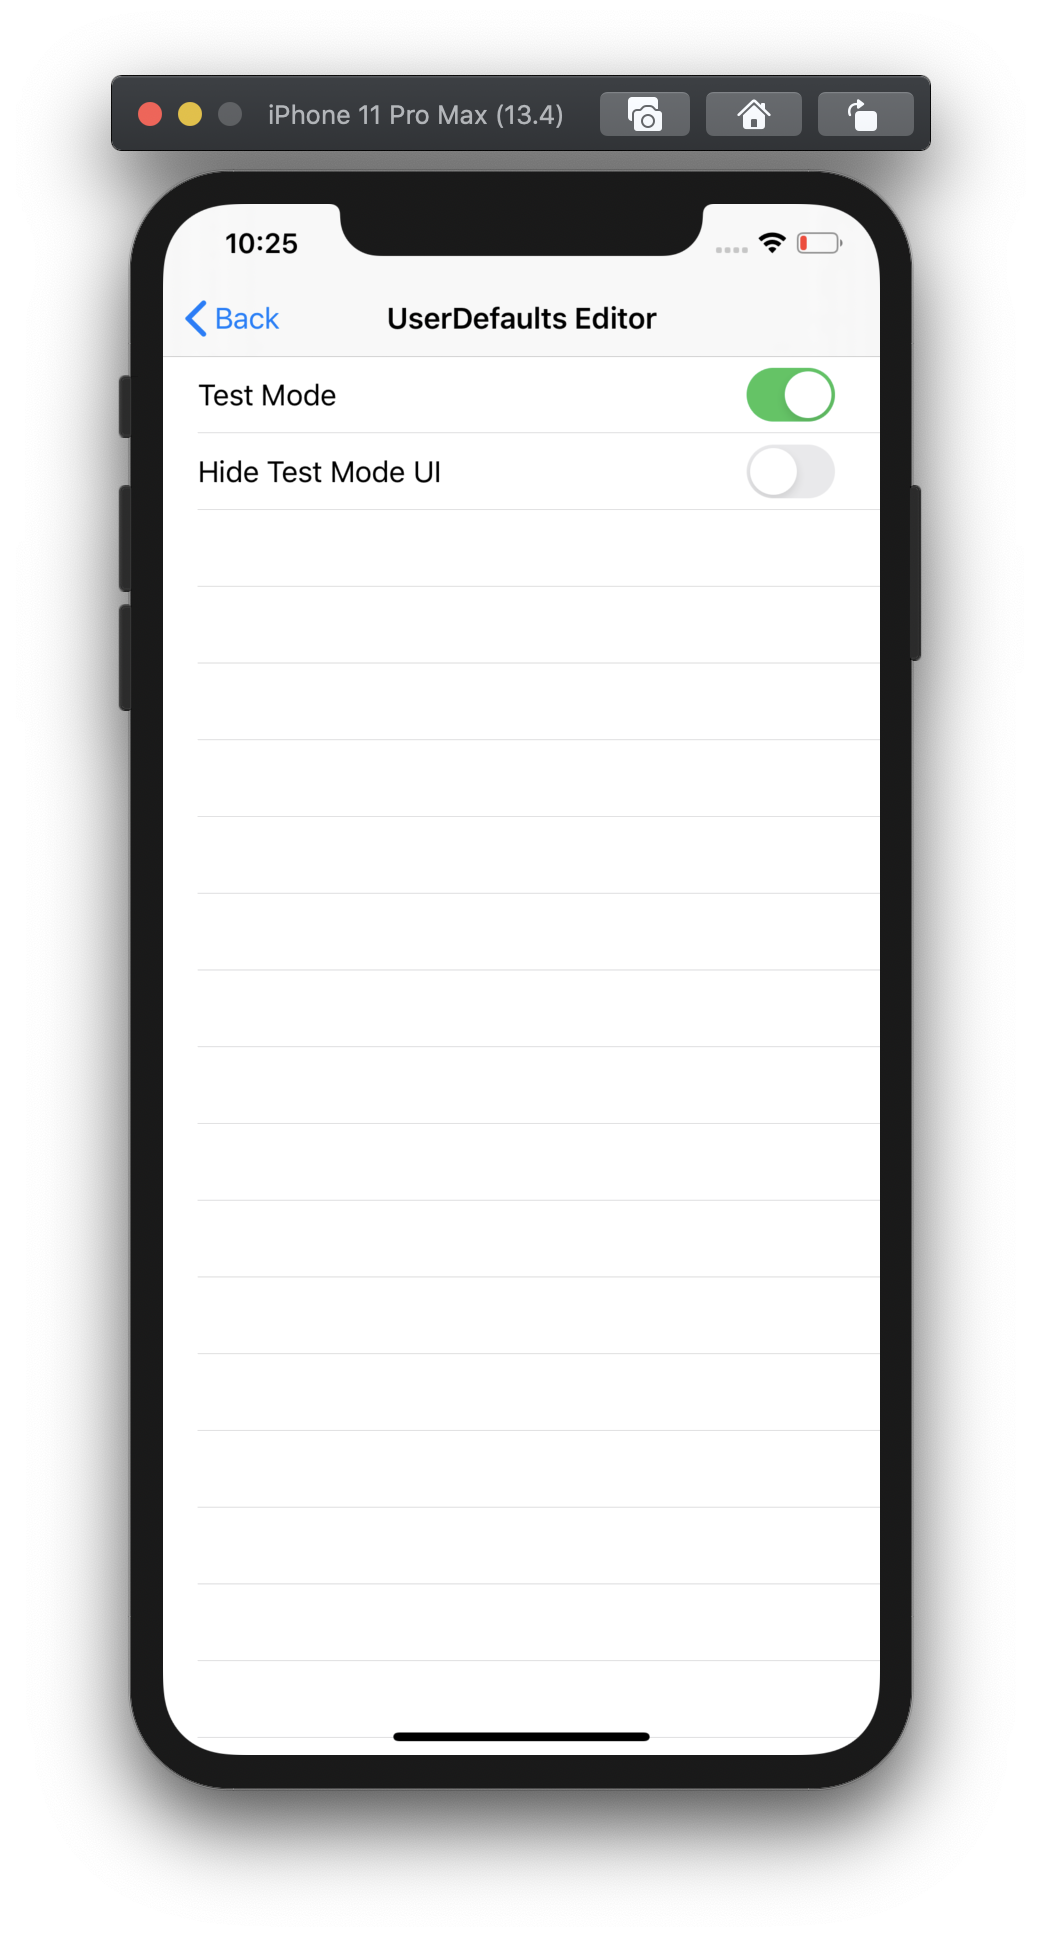
Here's what the sample app which implements this looks like - it's still surprising to me that SwiftUI enables creating nontrivial UIs like this in so few lines of code:
Conclusion
I think this ends up being a simple, expressive interface that allows for toggling all your UserDefaults flags in a debug menu view pretty easily. Property wrappers and key paths definitely make Swift more complicated, but they end up enabling really nice syntactic sugar like this, which I love as a developer because I get to spend less time writing boilerplate and more time focusing on the business logic of the apps I write.
Note: it might be possible to go even further with this approach: as of Swift 5.2, it should be technically possible to nest property wrappers, so there might be a way to make @Published work with @SimpleUserDefault. I haven't been able to make this work in practice without the Swift compiler segfaulting (Xcode 11.4.1) but if you figure out a way, please let me know.
I'm hoping to write more about SwiftUI and how it enables easier app development in the future! You can follow me on Twitter for updates 👋

Noah Gilmore
I'm Noah, a software developer based in the San Francisco Bay Area. I focus mainly on full stack web and iOS development
- 💻 I co-founded Replo, a no-code platform for e-commmerce
- ✍️ You can read technical posts on my blog
- 📱 I wrote an app which lets you create transparent app icons called Transparent App Icons
- 🧩 I made a puzzle game for iPhone and iPad called Trestle
- 🎨 I wrote a CoreImage filter utility app for iOS developers called CIFilter.io
- 👋 Please feel free to reach out on Twitter / 𝕏